Mastering Transition Strips Between Hardwood and Other Living Spaces
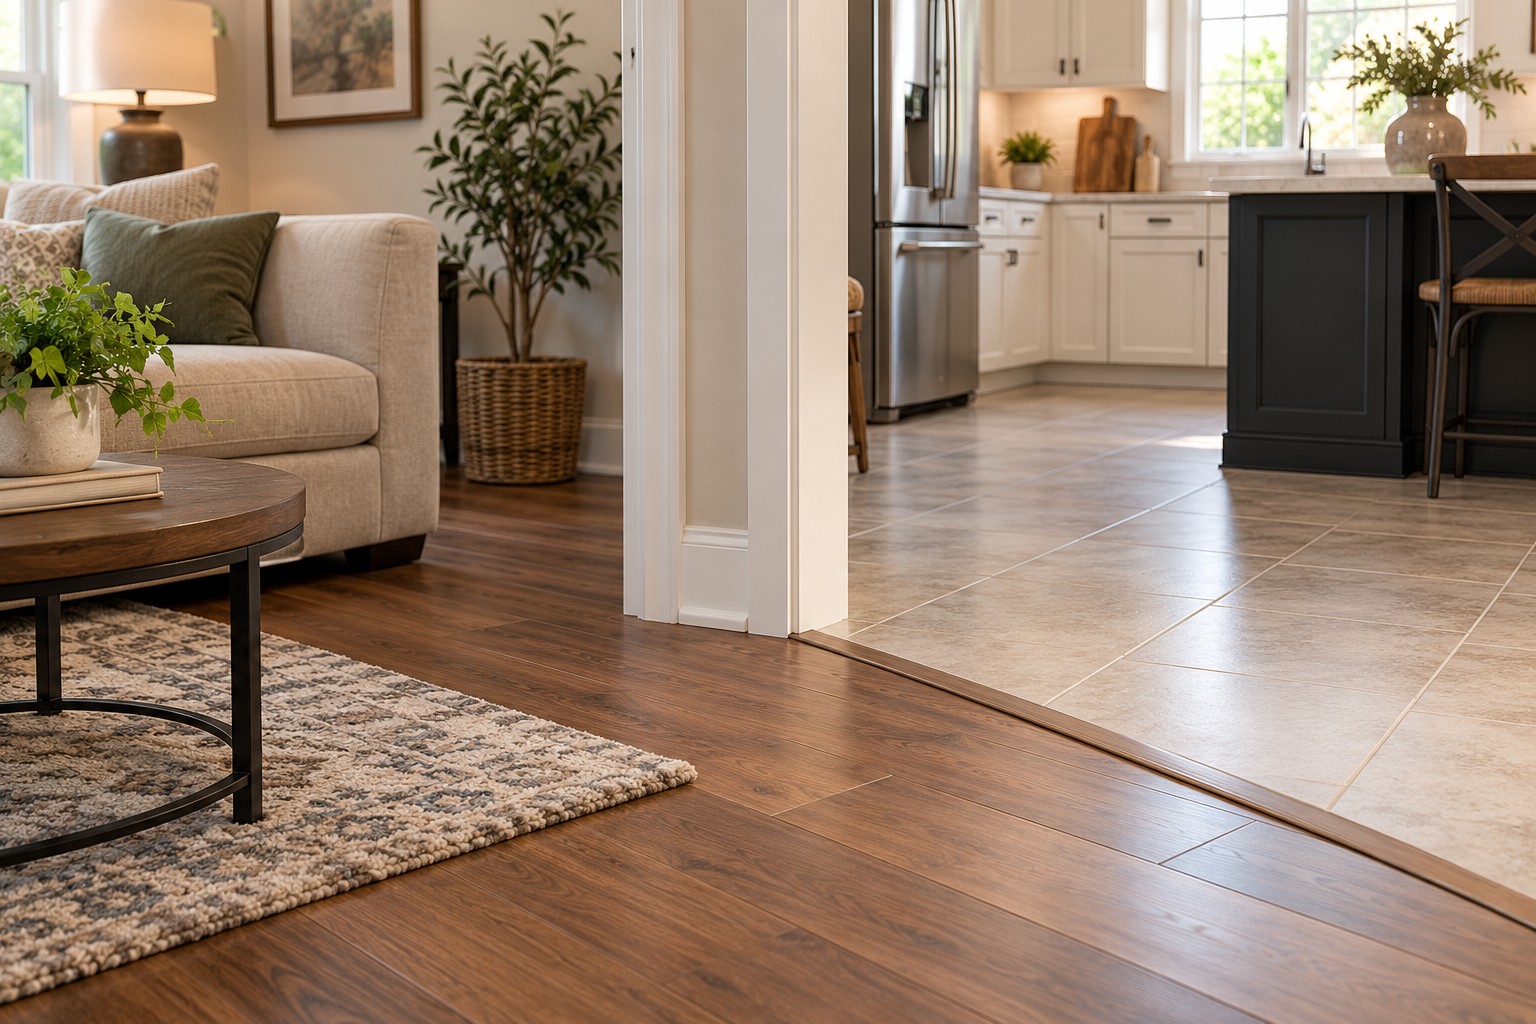
Hardwood floors bring natural warmth and architectural character to your interior design. Modern open layouts rarely feature a single surface throughout the entire home, which means your wood planks must eventually meet tile, carpet, or stone across doorways and wide openings.
Expansion gaps and material thickness differences make transition moldings an essential part of every successful flooring project. A properly fitted transition strip hides rough edges, protects vulnerable plank ends, and prevents tripping hazards between adjoining rooms.
At a Glance: Hardwood Transitions
- T-moldings join level surfaces of equal height, such as wood meeting another hard surface.
- Reducers create a smooth ramp down from higher wood planks to lower vinyl or thin sheet materials.
- End caps finish planks neatly against vertical surfaces, exterior thresholds, and sliding patio doors.
- Hardwood expands and contracts during seasonal humidity shifts, making dedicated expansion channels necessary underneath the profile.
- Matching the species and stain of your wood creates visual harmony across adjoining zones.
Why Floor Transitions Demand Careful Planning
Natural timber responds directly to shifts in relative humidity and ambient temperature. Boards absorb moisture from humid air and swell outward across their width, then shrink back down during drier cold snaps. If you run planks flush against an immovable ceramic threshold without a perimeter gap, the expanding wood buckles, cracks, or chips adjacent surfaces.
Subfloor variations add another layer of complexity across your home. Concrete slabs poured at different elevations, varying underlayment thicknesses, and uneven mortar beds create noticeable height offsets between rooms. Quality transition profiles bridge these elevation variances while preserving the recommended expansion gap underneath the strip.
Profile Styles for Every Adjoining Surface
Every material combination presents unique physical characteristics. Choosing the right profile depends on the thickness of both floors and the direction of foot traffic.
T-Moldings for Level Hard Surfaces
A T-molding bridges two hard floors of equal height. The top of the profile forms a horizontal cap, while the center stem drops down into the expansion channel between surfaces.
- Joins wood planks directly to luxury vinyl, engineered planks, or ceramic tiles that rest at identical heights.
- Anchors securely to the subfloor with track hardware or adhesive without pinning down the flooring boards.
- Allows both materials to expand and contract freely along the bottom stem.
Reducer Strips for Uneven Floor Levels
Hardwood often sits higher than surrounding utility floors. A reducer functions as a miniature ramp, sloping from the wood down to a thinner neighboring surface.
- Creates a gradual slope between thick wood planks and low-profile materials.
- Smooths access into laundry rooms, secondary entryways, or kitchens with lower profiles.
- Prevents toe-stubbing and eliminates abrupt edge drops that could damage bare board edges.
End Caps and Square Noses for Vertical Terminations
An end cap, often called a baby threshold or square nose, finishes a floor edge where it terminates against a vertical drop or stationary barrier.
- Borders thick stone hearths, exterior door frames, and floor-to-ceiling glass patio sliders.
- Provides a squared-off finish that conceals raw expansion gaps against vertical walls.
- Protects exposed end grain along sliding patio door openings where outdoor elements meet indoor floors.
Carpet Transitions and Z-Bars for Soft-Surface Rooms
Plush bedrooms and cozy living areas often meet central wood hallways. Bridging these distinct textures requires specialized hardware that holds soft textiles securely in place.
- Features a top molding paired with a subfloor metal Z-bar or tuck track.
- Grips stretched carpet backing firmly to maintain proper surface tension across the room.
- Encloses raw carpet fibers inside a neat, protective channel next to smooth wood planks.
Material Selection and Visual Balance
Transition hardware must handle constant foot pressure without fading, warping, or clattering underfoot. Selecting complementary materials preserves the design flow of your main living spaces.
- Solid and engineered timber: Matching the specific species and stain of your hardwood flooring creates a cohesive look across entryways and open walkways.
- Metal profiles: Slim aluminum, brushed nickel, or matte black brass tracks offer a crisp edge for modern urban homes.
- Molded composites: Moisture-resistant cores wrapped in durable vinyl provide reliable performance along wet bathroom boundaries.
- Flush-mount wooden thresholds: Sanding and finishing a custom wood threshold during a job gives you a flat plane across doorways, provided both floors match exact subfloor elevations.
Room by Room Transition Strategies
Every living zone inside your home serves a different daily purpose. Planning transitions around moisture levels, foot traffic, and shoe wear ensures each room functions properly.
Kitchens and High-Spill Zones
Kitchen floors frequently feature waterproof tiles to handle cooking splashes, dishwasher cycles, and dropped utensils. When running natural oak or maple up to ceramic finishes, choose a moisture-rated transition molding. Porcelain tiles resting on uncoupling membranes often sit slightly higher than engineered wood, requiring a reverse reducer to balance the plane.
Bathrooms and Wet Utility Areas
Powder rooms and primary bathrooms expose floor joints to damp air, water puddles, and tracked droplets. Porous wood swells if moisture seeps under the edges. Installing a water-tight seal along an end cap or reducer prevents dampness from traveling down into your wood subfloor layers. For maximum moisture protection in secondary baths, pairing wood corridors with waterproof tile flooring creates a durable boundary that resists everyday puddles.
Hallways and Open-Concept Thresholds
Wide open spaces blur the lines between dining rooms, family spaces, and hallways. If you switch materials across an expansive opening, align your transition strip directly under the center of the doorway header. When interior doors swing shut, the transition line sits completely hidden beneath the closed door panel from both sides.
Living Rooms and Bedrooms
Family spaces often balance the durable elegance of wood with the comfort of soft surfaces. Running planks straight into private bedrooms requires clean terminations that keep soft fibers taut. Pairing wood walkways with plush residential carpet creates quiet, comfortable bedroom entries while maintaining sturdy wood in busy corridors.
Common Installation Pitfalls to Avoid
Improper installation quickly ruins the look and longevity of your threshold moldings. Avoid these frequent errors:
- Nailing profiles directly into floating planks: Fastening transition strips directly through floating planks prevents natural seasonal expansion, causing the floor to cup or split. Always fasten the molding track to the concrete or plywood subfloor beneath.
- Skipping subfloor preparation: Uneven subfloors cause transition profiles to rock or creak under foot traffic. Level low spots before laying your hardware down.
- Cutting profiles too short: A short profile leaves unsightly gaps against the door casing. Undercut door jambs with an oscillating multi-tool so the molding slides neatly beneath the wood trim.
- Using incorrect adhesives: Standard construction adhesives can fail under sustained pedestrian impacts. Select flexible, heavy-duty floor adhesives designed specifically for trim profiles and subfloor bonds.
Plan Your Flooring Design with The Carpet Stop
Mastering the physical details between your rooms turns good design into lasting value. The Carpet Stop brings decades of flooring guidance to homeowners across Austin, TX. Whether you need to select matching trim profiles, coordinate wood species, or schedule a measure for your renovation, practical advice makes all the difference. Visit our showroom in Austin, TX to handle full-size profiles, compare stain matches, and find the right finishes for your home.